Working With IntelliJ for Java 1/2
IntelliJ is an IDE (Integrated Development Environment, rather than just a simple editor like Notepad++. It has many more features and tools that are common to more intermediate and advanced application development. This is a very popular IDE for students learning Java: it's project-based, yet also very simple to use compared to more professional IDEs such as NetBeans or Eclipse.
Downloading and Installing
Follow the instructions to first download, and then install IntelliJ IDEA to your machine.- Go to the IntelliJ IDEA download page.
- Click the download button under the "Community" edition.
Save the file to your computer.
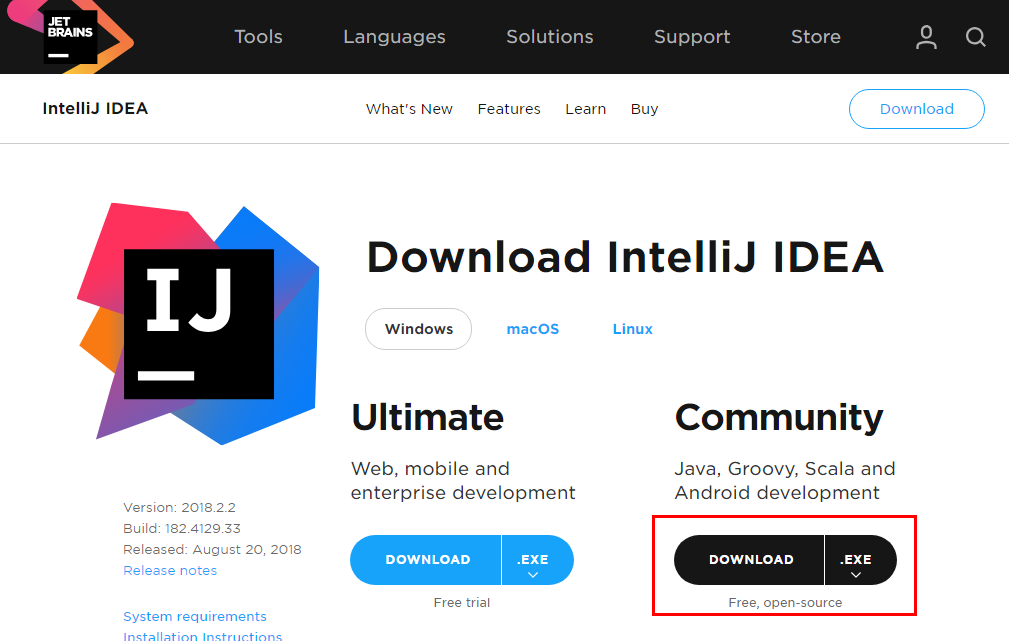
Download the Community edition of IntelliJ IDEA - Once the download is complete, locate the downloaded file and run it. If you are asked anything such as "Do you want to allow this app to make changes to your device?" just agree.
- Click NEXT on the opening welcome screen.
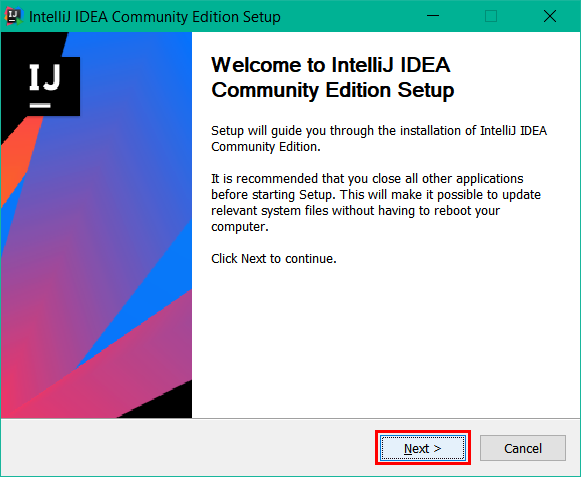
Click NEXT on the opening welcome screen. - The next screen confirms the location of your installation.
The default is fine: you don't need to change anything.
Click NEXT to continue.
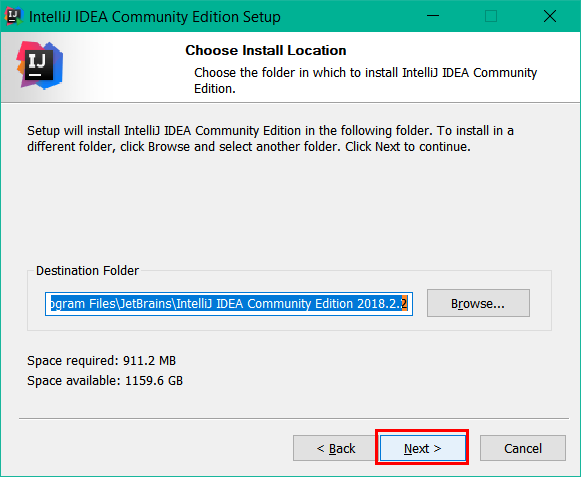
You don't need to change the install location. Click NEXT to continue. - The next screen asks you to configure a couple of options
for your installation:
- Create Desktop Shortcut: unless your computer is really old, select "64 bit launcher" (if your computer is that old, you probably won't be able to use it in term 2 and should start thinking about getting a new one).
- Create Associations: select ".java". This just means that when you double-click any .java file on your computer, it will automatically open with IntelliJ IDEA. Feel free to leave this unchecked if you prefer and you know what you're doing.
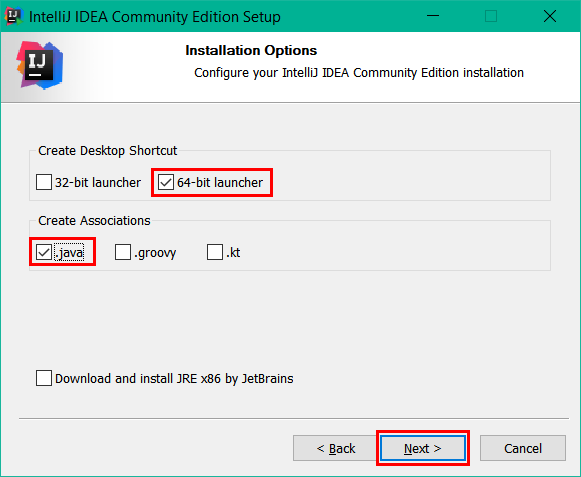
Select 64 bit launcher and .java files, then click NEXT. - The next screen asks you to choose a name for the folder in
your Windows Start menu for IntelliJ IDEA. You can
leave the default or change it if you want, it's up to you.
As long as you know where it is in future, it doesn't
matter. Click INSTALL.
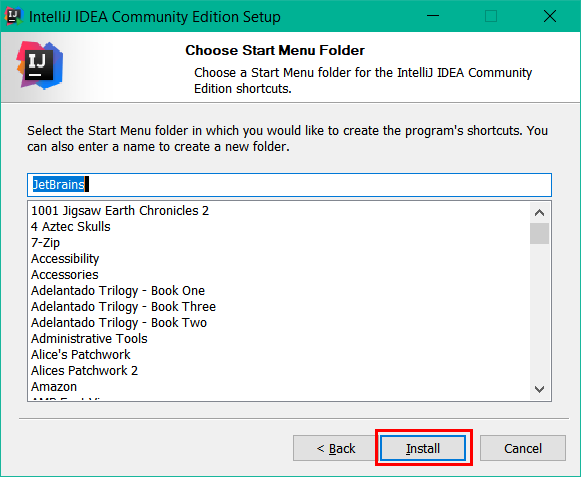
If you don't want to change the menu item in the Start menu, just click NEXT. - The installation will take some time. You can watch the progress window while the software is installing.
- The last window confirms that your installation is finished
and asks if you'd now like to run the IntelliJ IDEA program.
If you're in class, you probably want to check the box.
If you're at home and doing this on your own, it's up to
you if you want to run IntelliJ now or not. Either way,
click the FINISH button.
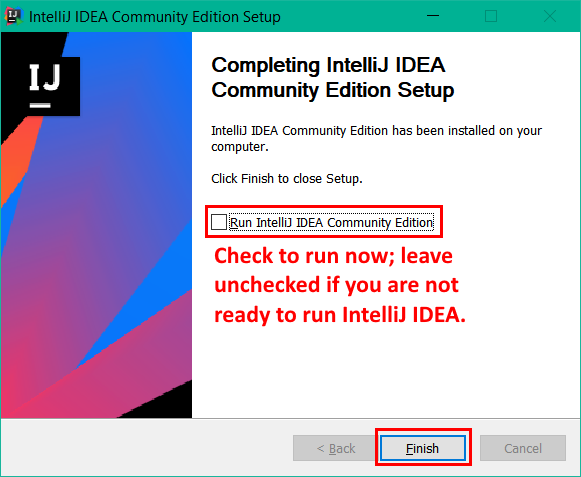
Decide if you want to run IntelliJ IDEA now (check the box) or not (leave box unchecked). Click FINISH.
Running IntelliJ for the First Time
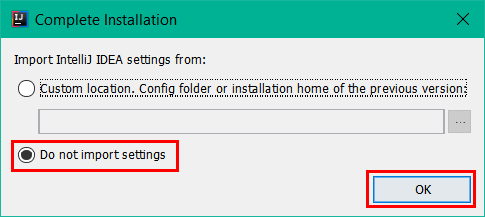
When you run IntelliJ for the first time, you'll be asked whether or not you want to import any settings from a previous installation. It's assumed you don't have a previous install, so just make sure "Do not import settings" is selected and click OK.
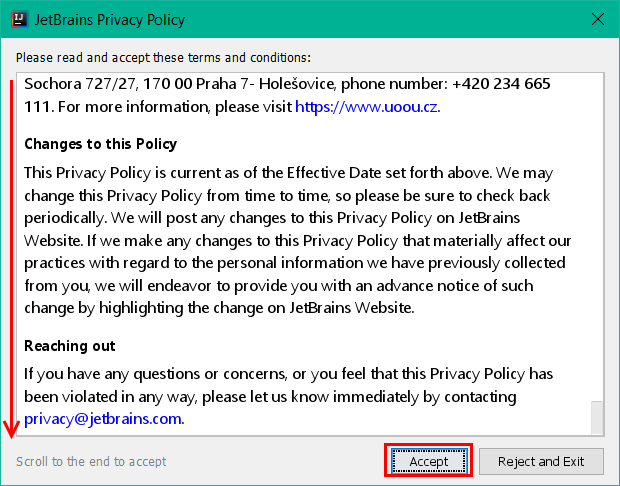
Next, you'll be asked to agree to the JetBrains privacy policy. This is standard. Scroll down to the bottom of the policy text (the ACCEPT button will remain disabled until you do so). Click the ACCEPT button once it has become enabled.
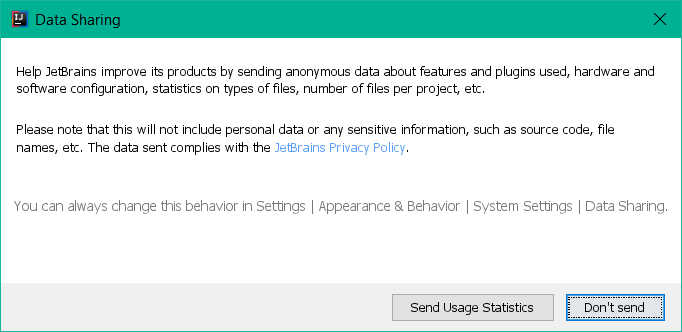
The next screen asks if you would like to share your usage stats with JetBrains (this is common for many companies where they want to track how/when users use their software). Personally, I never agree to these things, but it's really up to you. Click either button, depending on your preference.
Finally, IntelliJ IDEA starts up and you are asked to choose a default theme (you can change or customize this in the settings, later). Choose whether or not you want the darker theme or the lighter theme. You won't need to change any of the other options they're going to ask you about, so once you've made a choice, click "Skip Remaining and Set Defaults" on the bottom-left of the screen.

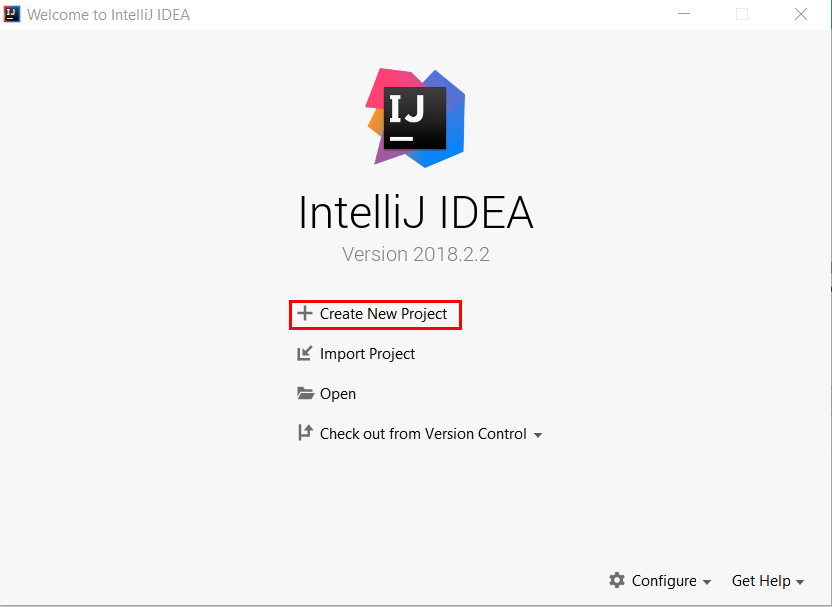
The splash screen appears while the program loads. When it disappears, you'll see the Welcome screen. This screen asks you what you'd like to do. We might as well start a new project!
Creating a New Project
You can create several different kinds of projects in IntelliJ. For this course, we'll primarily be creating simple Java projects. A Java project consists of one or more source code files that are then compiled into bytecode files. Bytecode files can then be run by any Java virtual machine.
After choosing to create a new project, you'll be asked what kind of project you want to create. Make sure Java is selected in the list on the left side of the screen.
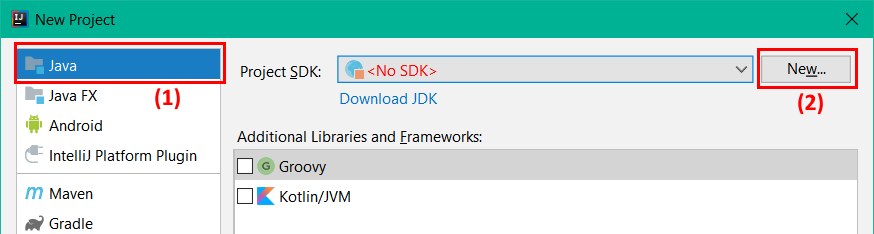
To the right is the Project SDK field. This asks you to choose which Development Kit you want to use for your project. If it says "No SDK", you'll have to select the one you installed earlier. Click the NEW button.
SDK = Software Development Kit, and JDK = Java Development Kit. These both refer to the same thing: the collection of tools and programs that allow a developer like yourself to create, compile, and run Java programs. Since you're using IntelliJ to create, compile, and run Java programs, you must tell it where the SDK/JDK is so it can use those tools when you tell it to do certain things.
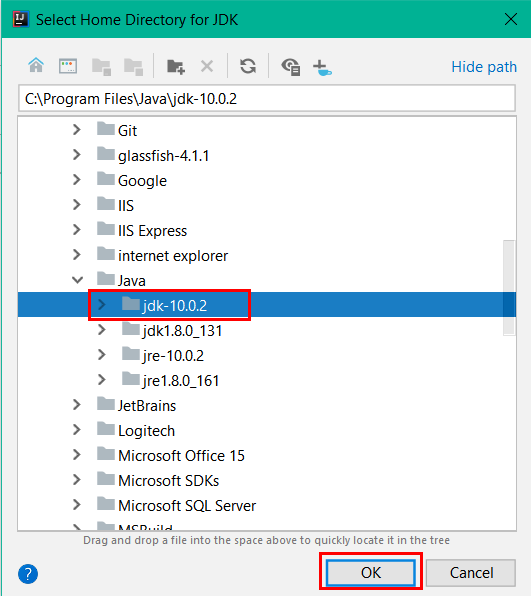
A dialog opens asking you to choose the location of your SDK. You should see your C: drive listed there, so use the little tiny arrow on the left to expand it and browse to your Program Files / Java directory on your system.
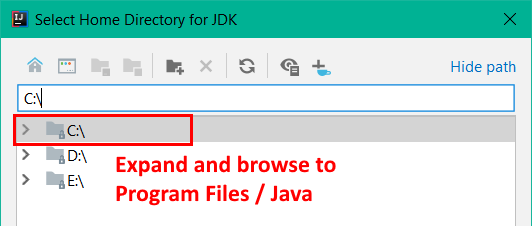
In the Program Files / Java directory, you should see your JDK folder, e.g. jdk-10.0.2 but the numbers might be different for you. Select that directory and then click the OK button.
Now you're back in the New Project dialog box. Ignore the bottom part of the screen where it asks about libraries. Click the NEXT button.
The next screen asks what template you want to use. We won't be using templates at this time so just ignore this screen. Click NEXT.
The last screen asks you to name your project and choose a project location. Earlier today you created directories/folders for your courses, including a java1/projects folder (or you might have called it prog10082 instead of java1, it doesn't matter). This is where you should store all of your projects. A single project contains multiple files, so when you make a project in IntelliJ, it will create a new directory/folder to contain all those files (this is often called the project's root). The name of your project root is the same as the name of your project.
In IntelliJ IDEA, each project runs in its own instance of the IntelliJ IDEA IDE.
Next, we create a name for our project. The project name is important, since that's how you'll be able to tell one project from another. Project names should be "self-documenting" (you should be able to accurately guess what the project is for just by reading the project name). In the example below, I called the project "FirstJavaProject". Enter an appropriate project name for your new project.
Next, we choose a location for our project files. Each project you create goes inside its own directory/folder. For example, if you create a project called "MyFirstProject", and you store it in your java1/projects folder, your project files should be located in the directory java1/projects/MyFirstProject directory.
The "Project Location:" field determines where your project and its files will be stored. By default, your Project Location may be listed as some other directory, but wee need to make sure we set it to our projects directory we created earlier. Also, since the project's files should go inside a FirstJavaProject directory, we'll need to create that directory, too.
Beside the "Project Location:" field, there's a small button with 3 dots (ellipsis) on it. Click that button to open the file browser.

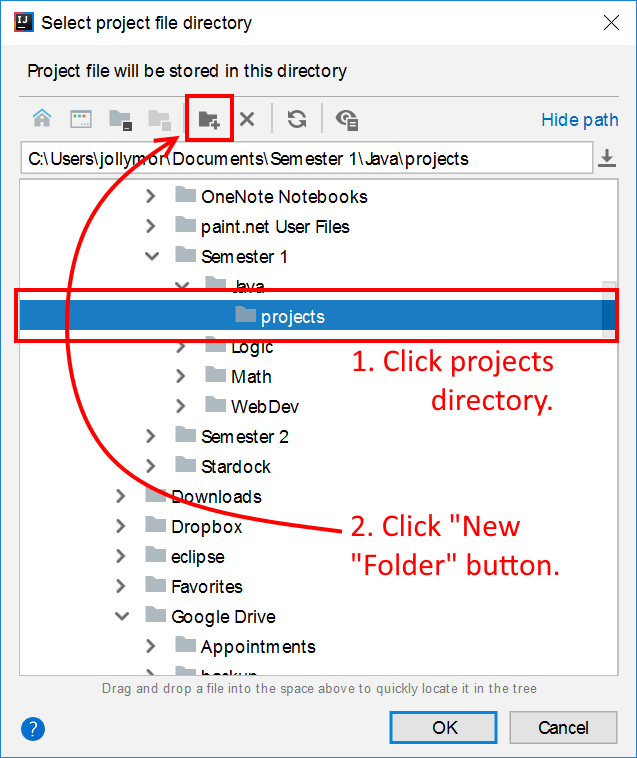
Now you have a file browser dialog open. Browse to your prog10082/projects (for Java 1) or prog24178/projects (for Java 2) directory and select it.
Then click the "New Folder" button in the button bar at the top.
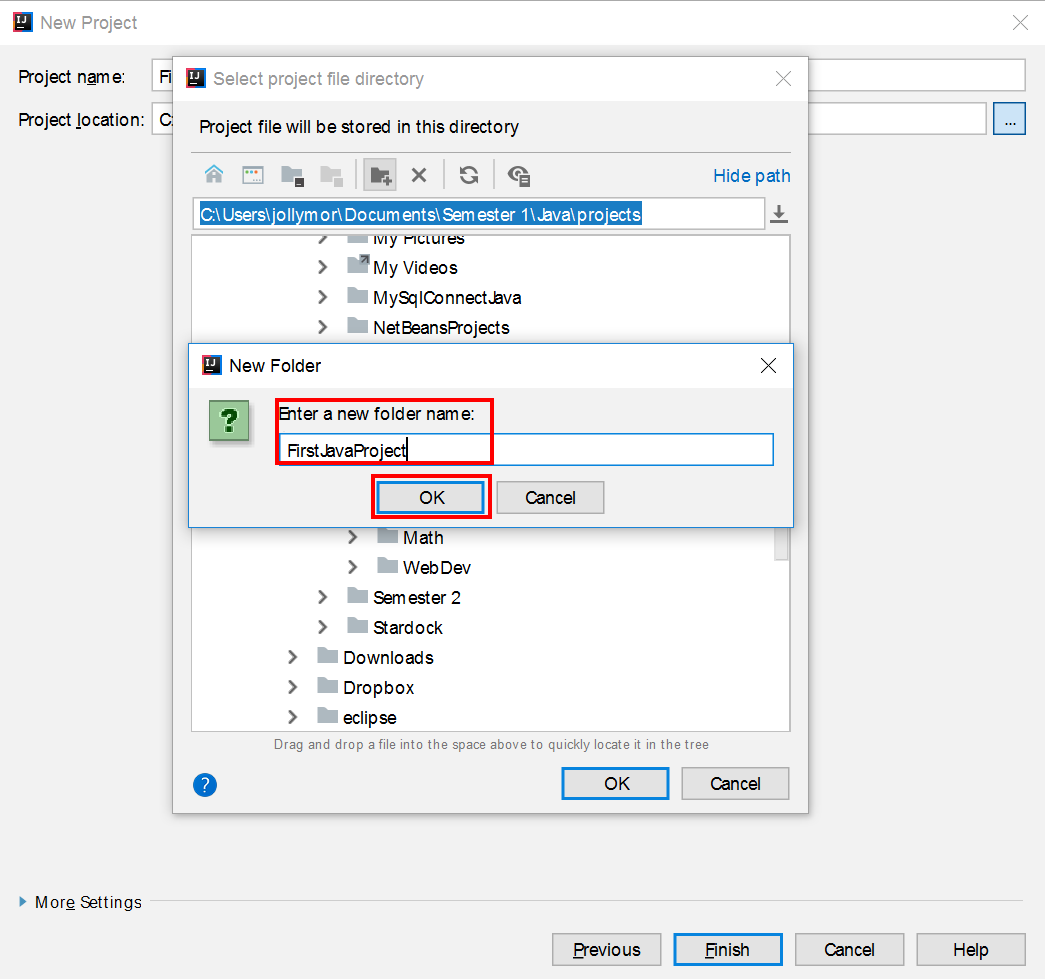
Now a smaller dialog opens, asking you to enter a new folder name. For this example, I typed "FirstJavaProject" since that's the name I chose for this project. After you enter a folder name, click the OK button.
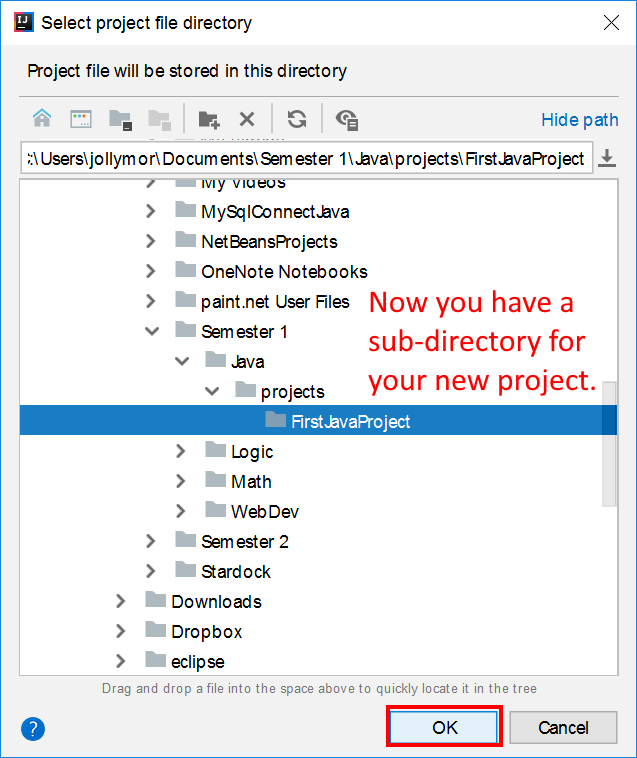
Now your file browser shows the new project directory inside your /projects directory. Make sure it's selected and then click OK.
You should now be back at the original new project dialog, and the Project Location field has been updated to your newly created project directory.

If you currently have another project open when you create a new project, you'll see the following dialog appear:

Each project you are working on in IntelliJ IDEA runs in its own instance of IntelliJ. In otherwords, if you have two projects open at the same time, you'll have two IntelliJ IDEA windows: one for each project (the program is running twice at the same time).
It's up to you whether or not you want to open your new project in the current window, or a new one. If you want to see both projects at the same time, then choose "New Window". If you only want the new project to be open, then choose "This Window". You will be prompted to save any unsaved work before the old project is replaced with the new one. (Don't worry, your old project is still on your computer, it's just not open anymore. You can always open it again later.)
Once your new project is created and loaded, you'll see the Tip screen. You can close it, view the next tip, choose not to see tips on startup, etc.
Configuration and Features
Setting IntelliJ Preferences
As you're learning to work in IntelliJ, you might wish to change some of your preferences such as colours/fonts, markers, etc. To find the settings, go to the File menu and choose Settings.
Right Margin Marker
By default there should be a vertical line in your editor that shows you where column 80 is. It is standard in Java programming to make sure that lines of code do not go beyond column 80, so we need to make sure there's a visual guide there to let us know when we should press the RETURN key on a long line of code.
First, we need to make sure that guide is in fact at column 80 (often the default is set to something else).
In the settings, go to Editor > Code Style (just click on Code Style, don't expand it).
Change the following settings:
- Hard Wrap at: 80
- Visual Guides: 80
- Wrap on typing: CHECKED
If you have trouble seeing the visual guide at column 80, you can change its colour by going to Editor > Colour Scheme > General. In the list in the top half of the screen, expand Editor > Guides and select "Visual Guides". To the right, you can then click the text field beside the "Foreground" check box to change the colour of the right margin marker. Unfortunately you can't change the thickness like you can in some other editors.
Theme, Fonts, and Colours
To change your default theme, go to Editor > Colour Scheme. Under Colour Scheme you'll also see several screens that allow you to customize the theme.
To change or enlarge the font, go to Editor > Font.
Helpful Features
Here are some helpful features of IntelliJ that past students have found very useful.
If you need help understanding the interface and its components, check out . This includes lots of keyboard shortcuts.
Distraction-Free Mode: press CTRL-SHIFT-F12 or, from the menu, select View > Enter Distraction Free Mode. These are toggles, so you can use the same commands to turn this on/off.
Comment or uncomment a line of code: Press CTRL-/ (control key plus forward slash).
Comment a block of code:CTRL-SHIFT-/ (control plus shift plus forward slash)
Navigate between opened tabs: Press ALT-RightArrow to go to the tab to the right, and ALT-LeftArrow to go to the tab to the left.
How to Zip Your Project's Source Files
These instructions are for Java 1 only.
For assignments in this course, you are required to submit all source files (.java) for your project. These instructions will help you locate the right files, and then place those files into a single, compressed file that you can submit to the SLATE assignment drop box.
Locate the Source Files
First, use a file manager/explorer to locate your project files:
- Browse to your prog10082/projects (or java1/projects, whatever you called your java 1 directory, and then the projects sub-directory).
- Inside the /projects directory, you'll see a sub-directory for each one of your Java projects you created.
- Your source code files (.java) are located inside one of your project's directories, inside the /src sub-directory.
- For example, if you want to submit your files for the project called FirstJavaProject, you would brose to prog10082/projects/FirstJavaProject/src
- In the /src directory, you'll see one or more source files.

Add the Files to a ZIP Archive
Once you've found your source code files, zip them into a single ZIP file:
- Select your source file(s) and then right-click to open the context menu.
- In your context menu, you should see an option for your installed compression utility (e.g. IZArc, 7-Zip, WinRAR, etc). In my example, I used IZArc.
- Use whatever menu options allow you to add your source file(s)
to a new archive.

Right-click your source file(s) and choose a menu option to create a new archive/zip file. - Use the dialogs of your compression utility to choose a location for your new ZIP file.
- DO NOT store your ZIP file in the /src
directory! I remcommend creating a folder off your/prog10082
directory called "submittedAssignments" or something similar, and
keep all of your zipped submissions in there. You can see in the
screen shot below, that's what I did.

Enter a name for your zip file, then choose a location. Don't put your file inside the project's /src directory! - Enter the correct name for your ZIP file (see your assignment specification for detailed instructions regarding submission file naming).
- Click the OK/Finish/Create/Whatever button to create your new .zip file.
When you're finished, you should have a .zip file you can upload to the assignment drop box.
Once you've done that, don't forget to copy and paste all of your source code into a separate .txt file for TurnItIn. DO NOT put the .txt file into your zipped file!!!