/*
Interactive Drawing Assignment
d20
Nathan Powless-Lynes @2015.9.18
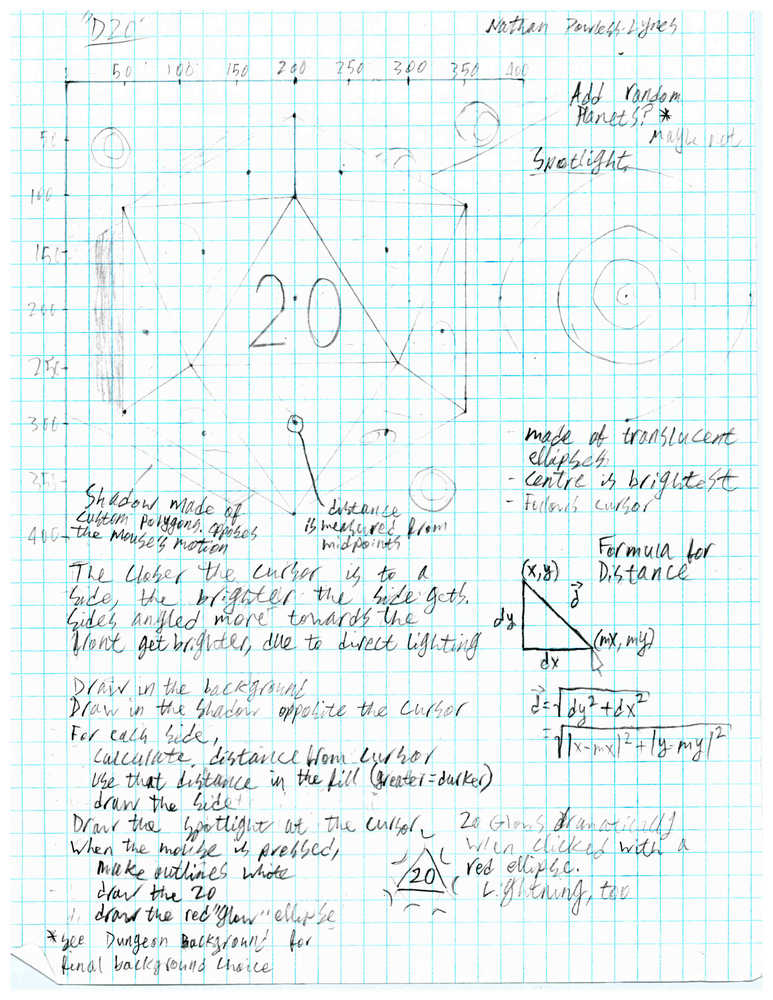
A 20-sided die in the middle of the screen will react to the spotlight aimed by the mouse. The brightness of each side
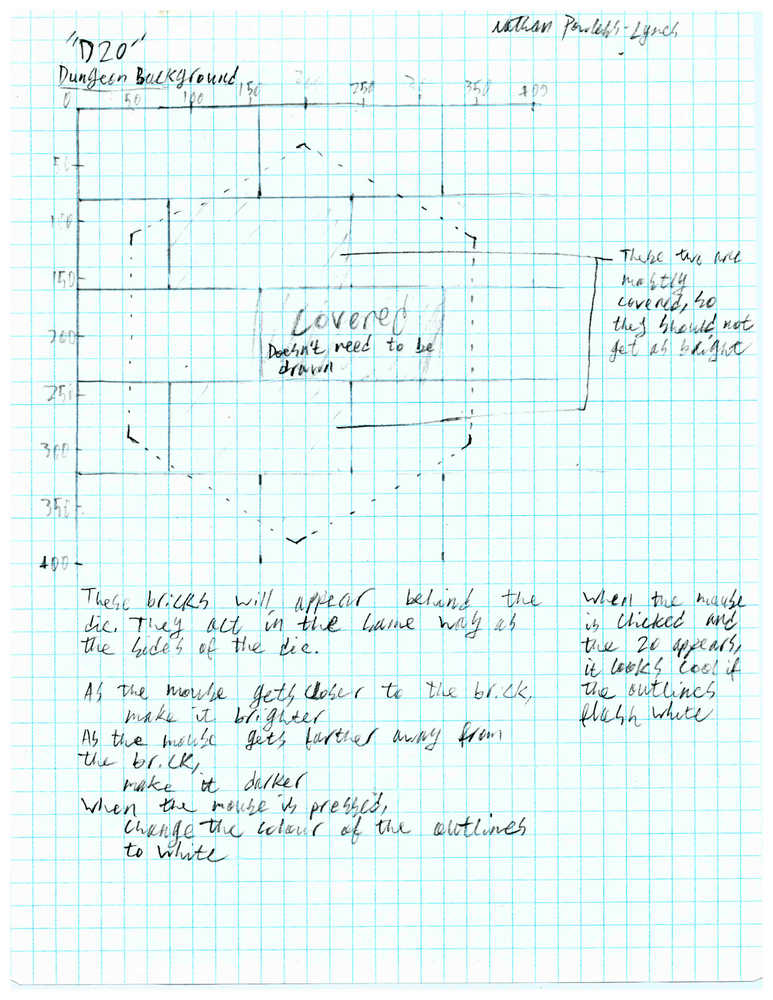
is dependant on the distance of the cursor, which acts as a beam of light. The background consists of bricks, which act
just like the die. Clicking will cue a critical (20) to be "rolled", and lighting strikes to simulate the tension that
may be experienced in an actual RPG.
Version history:
Version 1.0: features a twenty-sided die that lights accordingly to the position of the mouse. A spotlight follows
the cursor.
Version 1.1: added a shadow that is cast by the die. The shadow has both umbra and penumbra.
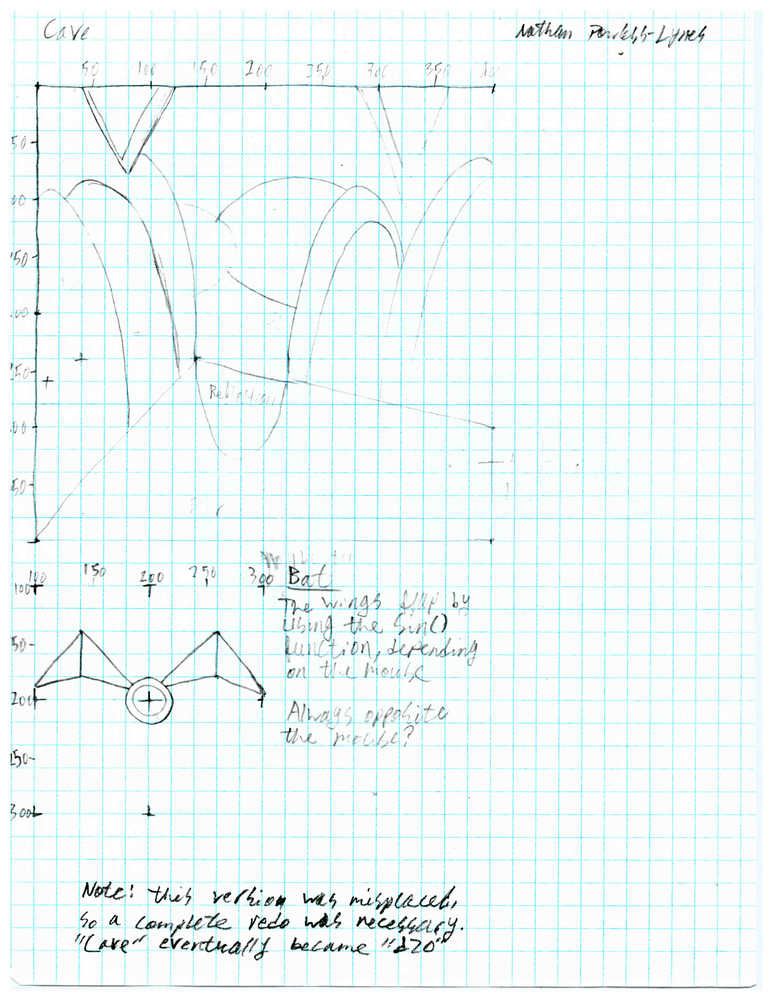
Version 1.2: added random planets in an effort to think of a new background.
Version 1.3: added critical hit when the mouse is clicked. The die glows red, and a "20" appears on the die.
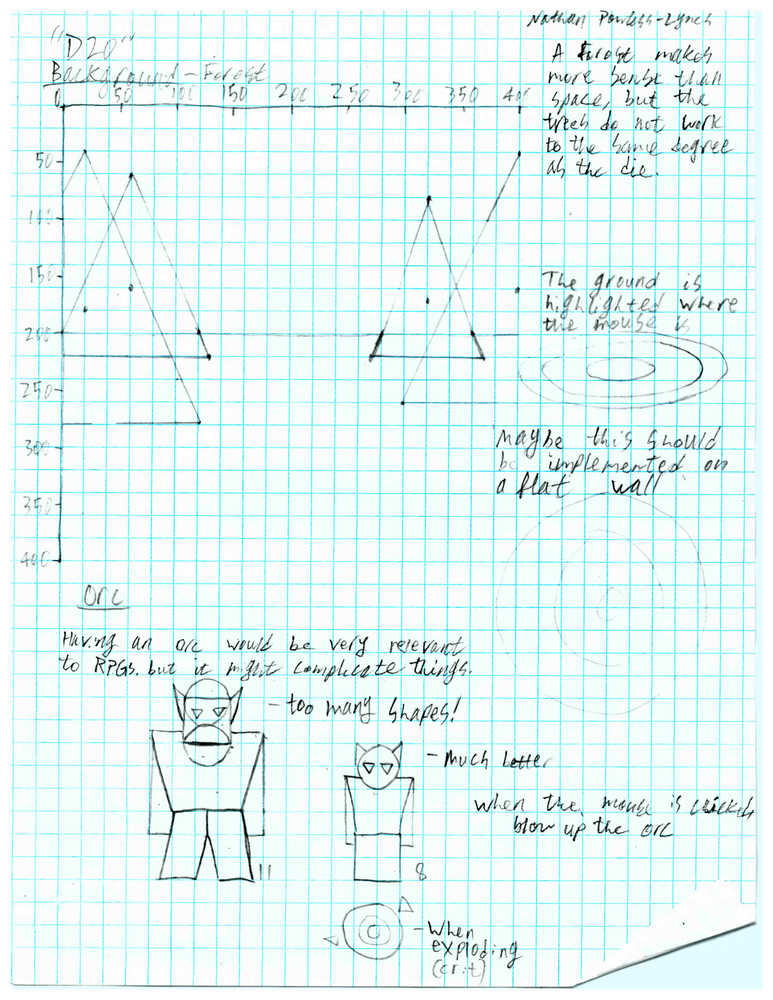
Version 1.4: shows critical on release, making it possible for the screen to flash rapidly. Tentatively replaced the
space background with a forest.
Version 1.5 (current): finally settled on a brick background. The cracks between bricks flash when the mouse is clicked,
simulating lighting.
*/
/*
setup()
This function is in every program in Processing. It literally just "sets up" all required elements for the program. Code
in here will be done once only, so it should be used for things that will never need to be changed or redrawn.
*/
void setup()
{
size(400, 400);//the size of the canvas
strokeWeight(5);//the thickness of any lines drawn. This will come in use for the "20" and the lightning
}
/*
draw()
This function is useful for any dynamic program in Processing. Anything program that needs things to be drawn over and
over as they change can utilize the draw() function. Code written in this function will be executed from top to bottom
as usual, but once the end of draw() is reached, it will loop back to the start of draw() and start again. In this
manner, the elements in the interactive drawing can appear to be animated and interact with the motion of the mouse.
Most of the code for this interactive drawing is in the draw() function.
*/
void draw()
{
/*
A brick background, setting the scene in a dark dungeon
Distance of each brick from the light source is determined by using Pythagorean Theorem. You
can see the code version of this theorem at every fill for the bricks. The difference between the X-components of
both the cursor position and the midpoint of the brick is used for B, as it is the horizontal distance between the
two. Similarly, the difference between the Y-components of the two are used for C, or the vertical distance. The
square-root is taken of them, multiplied by some number (in this case, 0.23) to make the change more gradual, and
subtract the whole thing from the base colour (85 or 75). In this manner, the greater the distance between the cursor
and a brick, the darker it will get, as more is being taken away from its base colour.
bricks listed starting from the top-left corner
*/
//top row, first brick
fill(85 - 0.23*sqrt(((80 - mouseX)*(80 - mouseX) + (40 - mouseY)*(40 - mouseY))));
rect(0, 0, 160, 80);
//top row, second brick
fill(85 - 0.23*sqrt(((240 - mouseX)*(240 - mouseX) + (40 - mouseY)*(40 - mouseY))));
rect(160, 0, 160, 80);
//top row, third brick
fill(85 - 0.23*sqrt(((400 - mouseX)*(400 - mouseX) + (40 - mouseY)*(40 - mouseY))));
rect(320, 0, 160, 80);
//second row, first brick
fill(85 - 0.23*sqrt(((0 - mouseX)*(0 - mouseX) + (120 - mouseY)*(120 - mouseY))));
rect(-80, 80, 160, 80);
//second row, second brick
//this one's base colour is darker because it is mostly covered by the die
fill(75 - 0.23*sqrt(((160 - mouseX)*(160 - mouseX) + (120 - mouseY)*(120 - mouseY))));
rect(80, 80, 160, 80);
//second row, third brick
fill(85 - 0.23*sqrt(((320 - mouseX)*(320 - mouseX) + (120 - mouseY)*(120 - mouseY))));
rect(240, 80, 160, 80);
//third row, first brick
fill(85 - 0.23*sqrt(((80 - mouseX)*(80 - mouseX) + (200 - mouseY)*(200 - mouseY))));
rect(0, 160, 160, 80);
//third row, second brick is covered completely by the die, so it need not be drawn
//third row, third brick
fill(85 - 0.23*sqrt(((400 - mouseX)*(400 - mouseX) + (200 - mouseY)*(200 - mouseY))));
rect(320, 160, 160, 80);
//fourth row, first brick
fill(85 - 0.23*sqrt(((0 - mouseX)*(0 - mouseX) + (280 - mouseY)*(280 - mouseY))));
rect(-80, 240, 160, 80);
//fourth row, second brick
//this one's base colour is darker because it is mostly covered by the die
fill(75 - 0.23*sqrt(((160 - mouseX)*(160 - mouseX) + (280 - mouseY)*(280 - mouseY))));//
rect(80, 240, 160, 80);
//fourth row, third brick
fill(85 - 0.23*sqrt(((320 - mouseX)*(320 - mouseX) + (280 - mouseY)*(280 - mouseY))));
rect(240, 240, 160, 80);
//bottom row, first brick
fill(85 - 0.23*sqrt(((80 - mouseX)*(80 - mouseX) + (360 - mouseY)*(360 - mouseY))));
rect(0, 320, 160, 80);
//bottom row, second brick
fill(85 - 0.23*sqrt(((240 - mouseX)*(240 - mouseX) + (360 - mouseY)*(360 - mouseY))));
rect(160, 320, 160, 80);
//bottom row, third brick
fill(85 - 0.23*sqrt(((400 - mouseX)*(400 - mouseX) + (360 - mouseY)*(360 - mouseY))));
rect(320, 320, 160, 80);
//making sure the lightning effect takes place only on the wall. When stroke is applied in "mousePressed()", it stays
//in effect until here
noStroke();
/*
The die's shadow, cast by the spotlight on the cursor.
The shadow features two parts: penumbra (outer part) and umbra (inner part). This is a natural phenomenon that occurs
with most kinds of lighting, so it seemed appropriate to add a sense of realism to the drawing.
This is made from a custom shape, which is initiated by "beginShape()", states each vertex, and then closes the shape
with "endShape();"
Each vertex must move as the mouse does to simulate a shadow. Each vertex has a location that it will be at when the
mouse is in the top-left corner, or when mouseX and mouseY are 0. Then, as each value increases, the corresponding
coordinate for the vertex must change inversely. This causes the shadow to always be on the other side of the light
source.
Just like the bricks (see detailed description on line 64), distance is determined using Pythagorean Theorem, but this
time, it is the distance of the mouse from the centre of the canvas. This makes it so the shadows get darker as they
approach the edges of the canvas.
*/
//penumbra (outer shadow)
//slightly larger than the umbra
fill(30 - 0.4*(sqrt((200 - mouseX)*(200 - mouseX) + (200 - mouseY)*(200 - mouseY))), 30- 0.4*(sqrt((200 - mouseX)*(200 - mouseX) + (200 - mouseY)*(200 - mouseY))), 30 - 0.4*(sqrt((200 - mouseX)*(200 - mouseX) + (200 - mouseY)*(200 - mouseY))), 100);
beginShape();
vertex(400 - mouseX, 230 - mouseY);
vertex(550 - mouseX, 310 - mouseY);
vertex(550 - mouseX, 490 - mouseY);
vertex(400 - mouseX, 580 - mouseY);
vertex(250 - mouseX, 490 - mouseY);
vertex(250 - mouseX, 310 - mouseY);
endShape();
//umbra (inner shadow)
//slightly smaller than the penumbra
//uses the same fill as the penumbra, but overlaps it to look darker
beginShape();
vertex(400 - mouseX, 264 - mouseY);
vertex(520 - mouseX, 328 - mouseY);
vertex(520 - mouseX, 472 - mouseY);
vertex(400 - mouseX, 544 - mouseY);
vertex(280 - mouseX, 472 - mouseY);
vertex(280 - mouseX, 328 - mouseY);
endShape();
/*
The 20-Sided Die
The die operates in very much the same way as the wall; the greater the distance each side is from the light source,
the darker it gets (see line 64 for detailed distance formula). However, it is slightly different by the manner in
which the base colours for each side differ depending on how direct the beam of light will hit it. This is just like
reality, where a direct beam of light will illuminate a surface better.
There are no numbers on this die (except when the mouse is clicked. See "mousePressed()", as the focus should be
the play of light on the angled surfaces. The illusion of three-dimensionality can be given just by the way the
die is lit.
Sides listed in symmetrical pairs from top to bottom (by midpoint)
*/
//top pair, left
fill(90 - 0.2*sqrt(((160 - mouseX)*(160 - mouseX) + (80 - mouseY)*(80 - mouseY))));
triangle(50, 110, 200, 30, 200, 100);
//top pair, right
fill(90 - 0.2*sqrt(((240 - mouseX)*(240 - mouseX) + (80 - mouseY)*(80 - mouseY))));
triangle(350, 110, 200, 30, 200, 100);
//second from top pair, left
fill(95 - 0.21*sqrt(((120 - mouseX)*(120 - mouseX) + (150 - mouseY)*(150 - mouseY))));
triangle(50, 110, 110, 250, 200, 100);
//second from top pair, right
fill(95 - 0.21*sqrt(((280 - mouseX)*(280 - mouseX) + (150 - mouseY)*(150 - mouseY))));
triangle(350, 110, 290, 250, 200, 100);
//middle pair, top (20)
fill(100 - 0.22*sqrt(((200 - mouseX)*(200 - mouseX) + (190 - mouseY)*(190 - mouseY))));
triangle(200, 100, 110, 250, 290, 250);
//middle pair, bottom
fill(90 - 0.2*sqrt(((200 - mouseX)*(200 - mouseX) + (300 - mouseY)*(300 - mouseY))));
triangle(200, 380, 110, 250, 290, 250);
//side pair, left
fill(85 - 0.2*sqrt(((70 - mouseX)*(70 - mouseX) + (220 - mouseY)*(220 - mouseY))));
triangle(50, 110, 50, 290, 110, 250);
//side pair, right
fill(85 - 0.2*sqrt(((330 - mouseX)*(330 - mouseX) + (220 - mouseY)*(220 - mouseY))));
triangle(350, 110, 350, 290, 290, 250);
//bottom pair, left
fill(85 - 0.2*sqrt(((120 - mouseX)*(120 - mouseX) + (310 - mouseY)*(310 - mouseY))));
triangle(200, 380, 50, 290, 110, 250);
//bottom pair, right
fill(85 - 0.2*sqrt(((280 - mouseX)*(280 - mouseX) + (310 - mouseY)*(310 - mouseY))));
triangle(200, 380, 350, 290, 290, 250);
/*
The Spotlight
This is a simple trick made by overlapping a number of translucent ellipses. They are all centred at (mouseX, mouseY),
so they will always be drawn directly under the cursor.
Although the spotlight does not "interact" with anything by changing values, its transparent ellipses do offer some
actual brightness to whatever is under them. Also, it makes a lot of sense to have the light source LOOK like a real
light source, again adding to the realism of the drawing.
*/
//the ellipses, largest to smallest
fill(255, 255, 0, 20);//translucent yellow
ellipse(mouseX, mouseY, 220, 220);
ellipse(mouseX, mouseY, 110, 110);
ellipse(mouseX, mouseY, 50, 50);
fill(255, 255, 200, 80); //the smallest ellipse is the most focused, so it is the whitest and brightest
ellipse(mouseX, mouseY, 20, 20);
}
/*
mousePressed()
This function is run through once from top to bottom when a button on the mouse is pressed.
In the case of this drawing, when the mouse is pressed, the die "rolls" a 20. This the highest number the die can roll,
and is known as a "critical hit" in RPGs, so it made sense to add some drama when this occurs. The number 20 appears,
the die glows red and lightning seems to strike behind the wall. Crazy things happen when you get a critical hit.
The glowing effect is achieved by drawing a translucent red ellipse on top of the die. Then, the number 20 is made of a
couple of lines, an arc and an ellipse. The stroke colour is changed so that when the bricks are redrawn, they have a
white outline for a moment that makes it look like there was a flash of lighting.
*/
void mousePressed()
{
//glowing on crit
fill(255, 0, 0, 60);//translucent red
ellipse(200, 200, 300, 300);//just as wide as the die
//number 20
noFill();//so the arc will not fill with colour
stroke(255);//white for the 20, also for the lighting
//the "2"
line(190, 230, 160, 230);
line(160, 230, 188, 193);
arc(175, 200, 30, 60, PI+0.3, 2*PI - 0.3, OPEN);
//the "0"
ellipse(228, 200, 30, 60);
}
/*
mouseReleased()
This function is run through once from top to bottom when a button on the mouse is released.
This function serves the same purpose as mousePressed(), making the 20, the glow and the lighting. It just makes the
same things happen on the release of the mouse instead of the press, making the lighting flash quicker than possible
with just mousePressed().
*/
void mouseReleased()
{
//glowing on crit
fill(255, 0, 0, 60);//translucent red
ellipse(200, 200, 300, 300);//just as wide as the die
//number 20
noFill();//so the arc will not fill with colour
stroke(255);//white for the 20, also for the lighting
//the "2"
line(190, 230, 160, 230);
line(160, 230, 188, 193);
arc(175, 200, 30, 60, PI+0.3, 2*PI - 0.3, OPEN);
//the "0"
ellipse(228, 200, 30, 60);
}